
Mist Edge as WFH solution
Cloud Wireless
I love cloud native wireless solutions! I think they’re more scalable, more flexible. I have a single point of management and no single point of failure. There are some “drawbacks” too though. Compliance for example, maybe your customer has principal reasons not to be on cloud provider xyz. And for some reason customers think the Wi-Fi will stop working without when the internet connection goes down. Though all your other cloud solutions like office365 might, Wi-Fi will probably remain online unless you’re using a cloud radius and LDAP solution, then connecting to the Wi-Fi will be troublesome. The thing you do need to do however is, as there is no controller to tunnel all traffic to, you need to configure your entire VLAN setup all the way to the edge switches. But with a single point of management this should be easy ;)
In some cases however you DO want to tunnel traffic. Maybe your local regulations will not allow public traffic and corporate traffic to be mixed for example. Or as I’m going to demonstrate using the Juniper/Mist Edge you can create a WorkFromHome solution using the Mist Edge.
JNCIS-MistAI
As I teach Juniper Mist Wi-Fi classes I’d like to know more about things we’re teaching then just the slide info. In the packed 4 day JNCIS MistAI class there is no room to dive into the Mist Edge in detail but of course people do ask. So I did some digging and experimenting on how to use the Mist Edge as a WFH solution.
The Mist Edge moves doesn’t move the control and AI plane to your premise, this remains in the cloud, it extends the dataplane and microservices used for this to your Mist Edge located in your DMZ most likely. From here you can then control the flow of data more stringent if needed.
ESXi Hardware
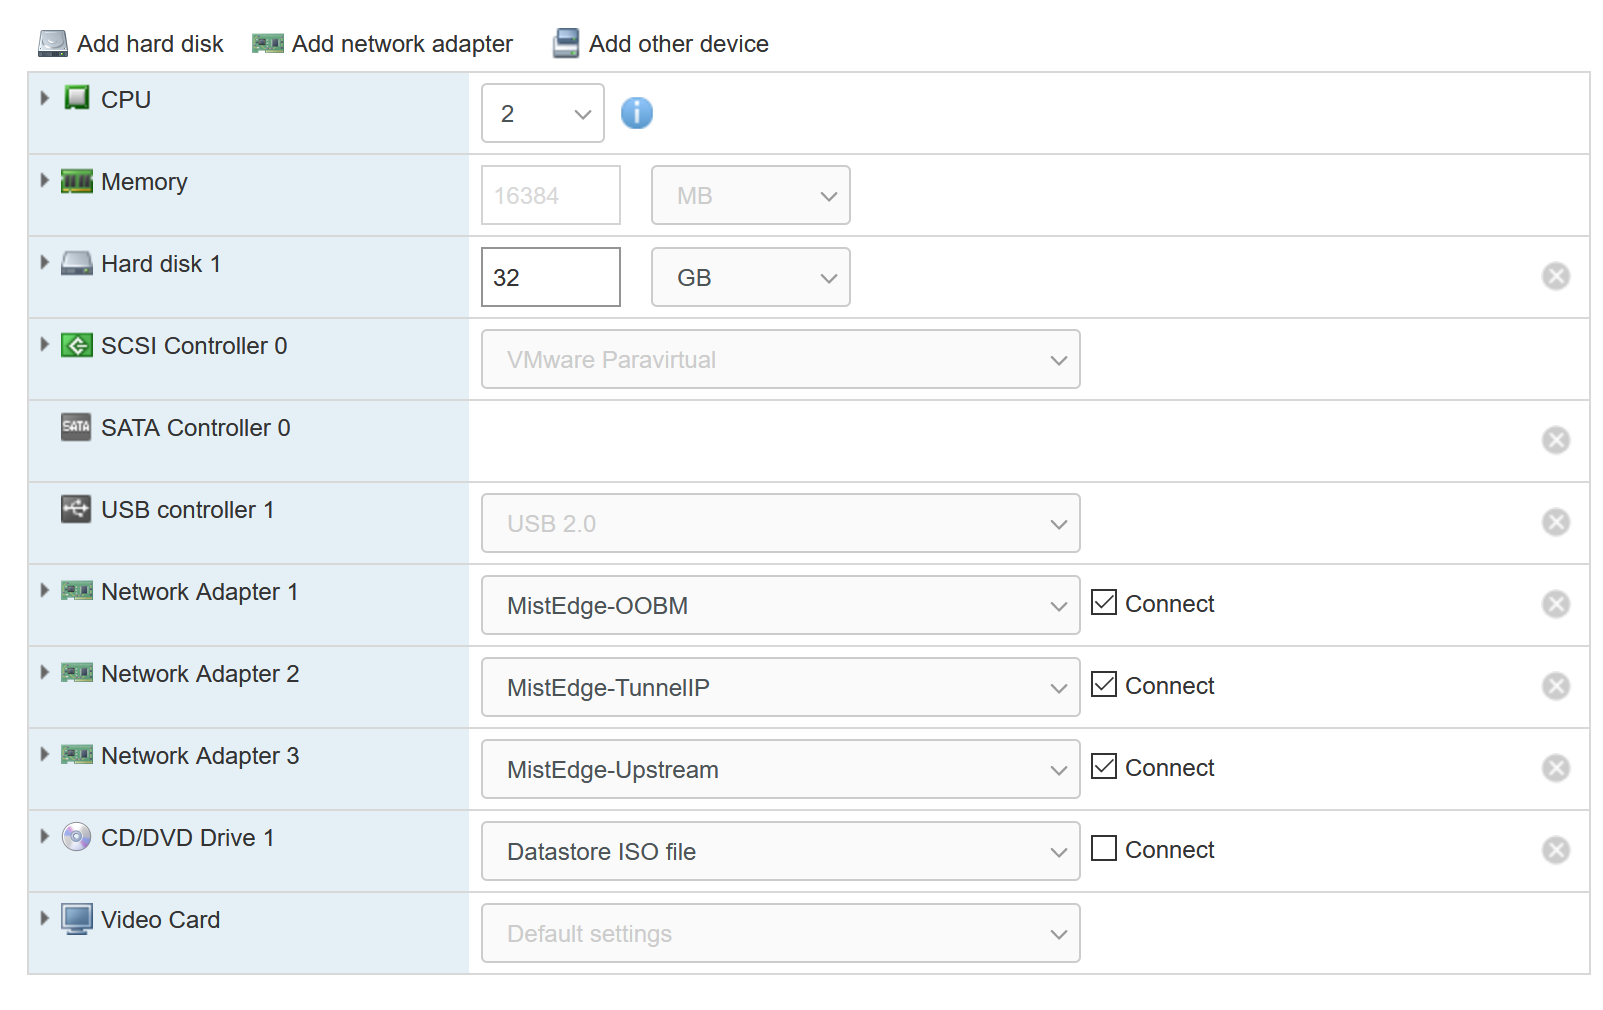
For my test and POC environment I’m using a VM instead of a dedicated appliance. My Dell server runs ESXi and should have plenty of memory and CPU, it is however limited to 2 1gbps Broadcom NICs.
To start off with the POC VM requirements:

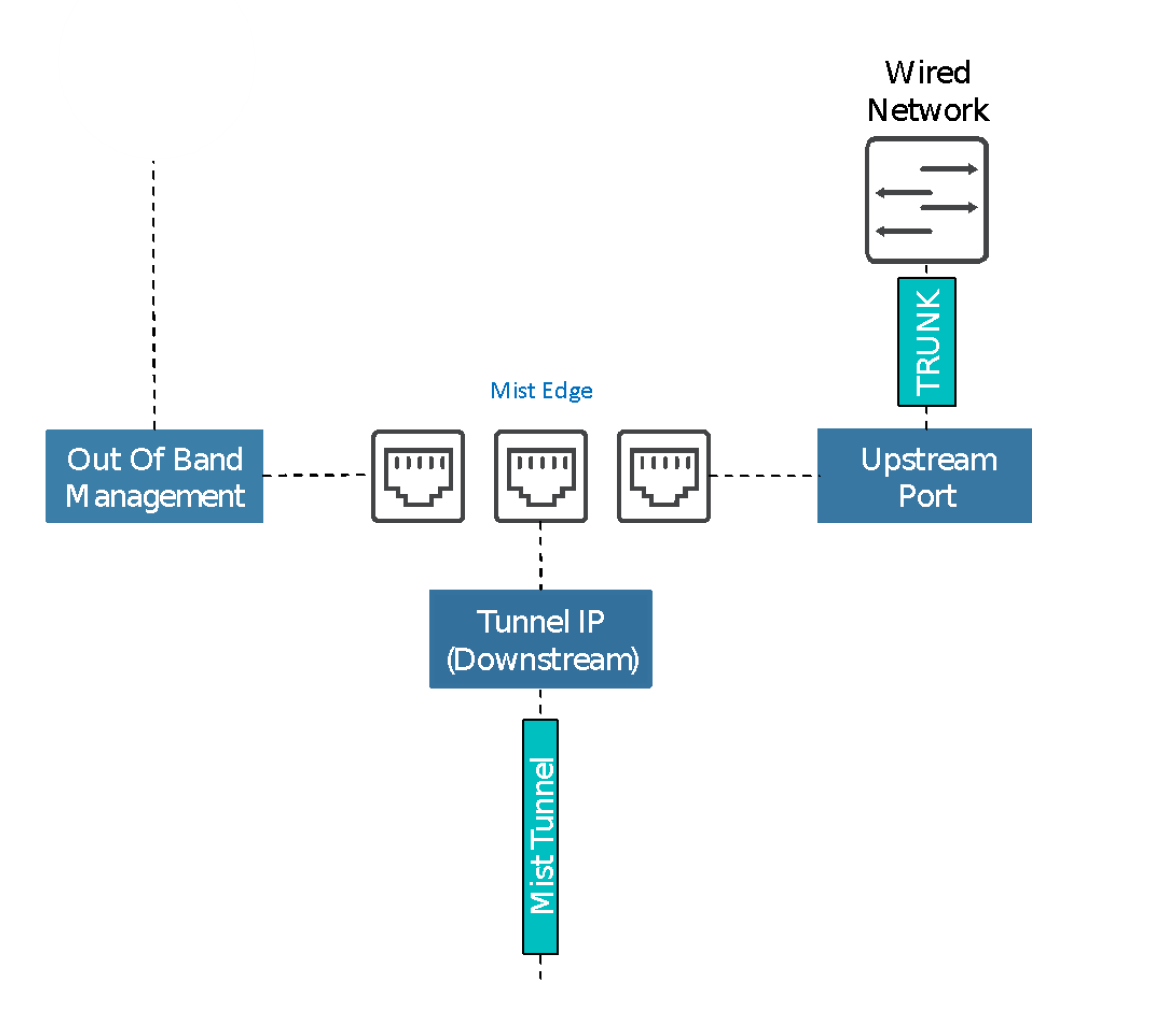
The 3 virtual NICs will be used for:
- OOBM (out of bound management aka the Mist Cloud)
- Tunnel interface (DMZ in my case)
- Outbound interface (Test VLAN in my case)
Step1
I have created a virtual switch in ESXi and assigned it to an unused NIC.
There I have the OOBM NIC assigned to vlan 0 (untagged to native) the Tunnel NIC is vlan30, to my DMZ segment and one is vlan 4095 wich in ESXi means it’s a trunk port.

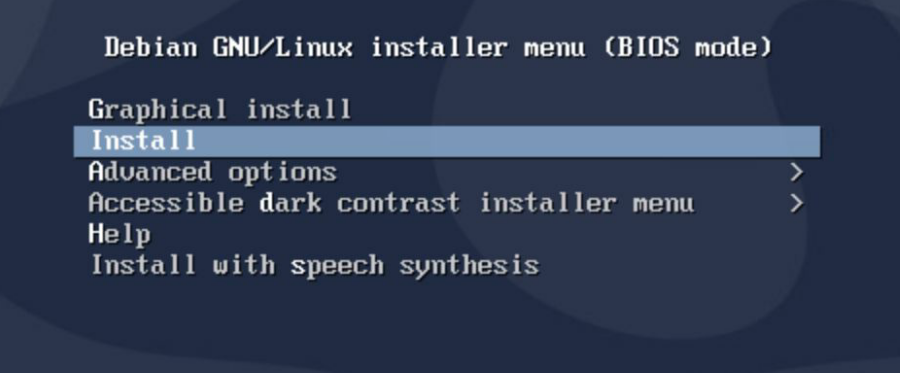
Then it’s time to create the VM and assign it the Edge ISO (ask your Juniper contact for details and availability)
At first boot you need to choose install in the GUI, not Graphical install!
step2
Next up is creating a new Mist Edge in your mist UI. You can find this under the Organization menu.
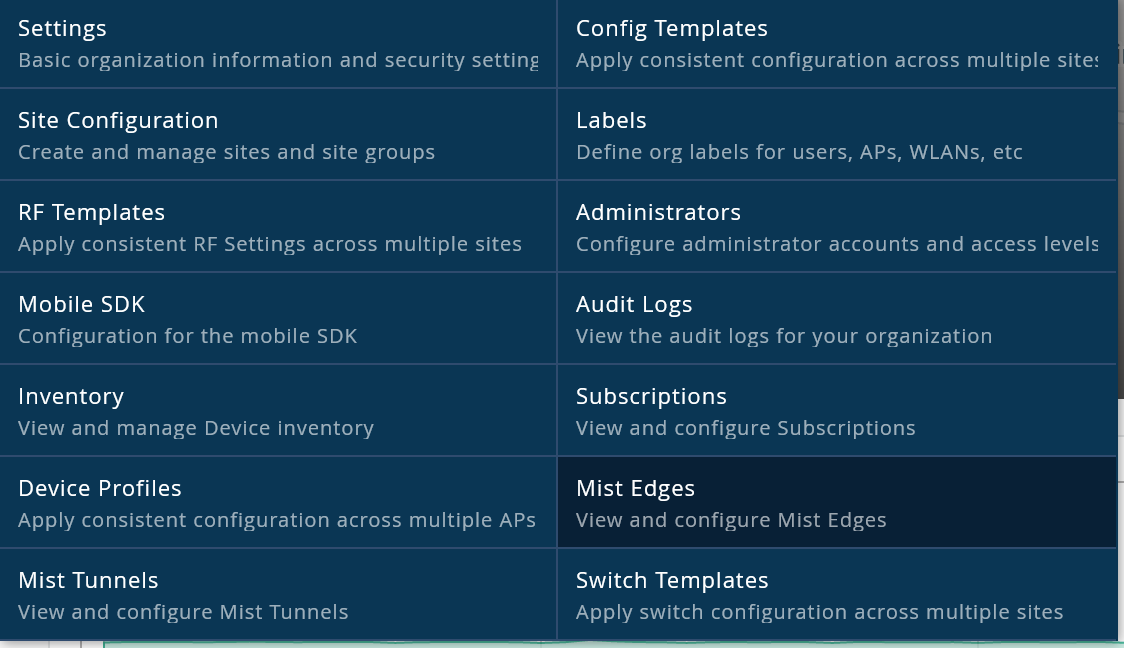
Make sure you select the VM option.

Then it’s time to set up the Edge VM:
At first you wont be able to select a cluster as none is created yet. But even with one edge VM we will create and assign a cluster!
Split the interfaces and enter your DMZ IP details:
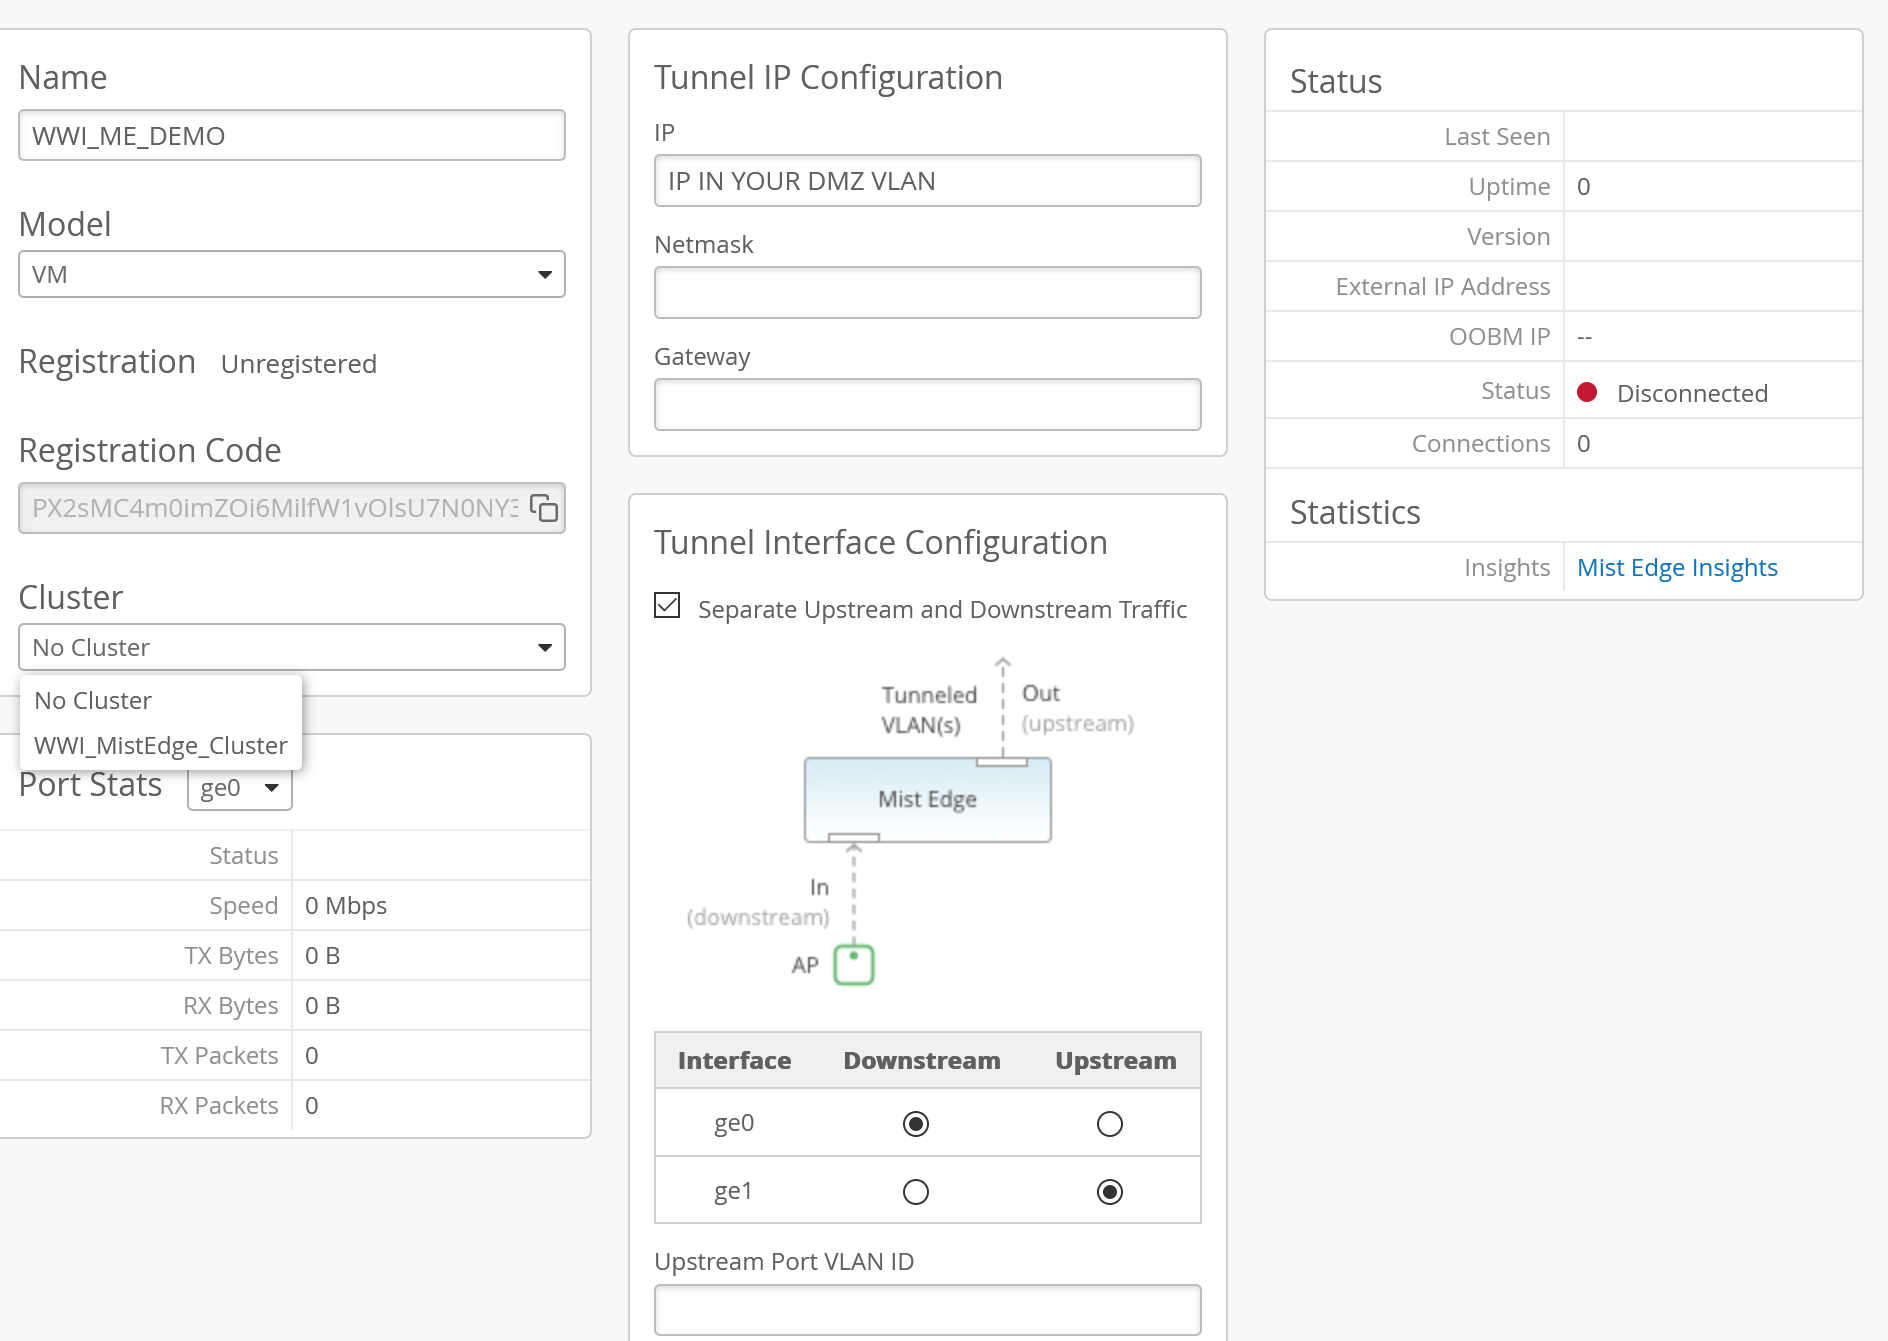
Don’t forget to copy and save the registration code!
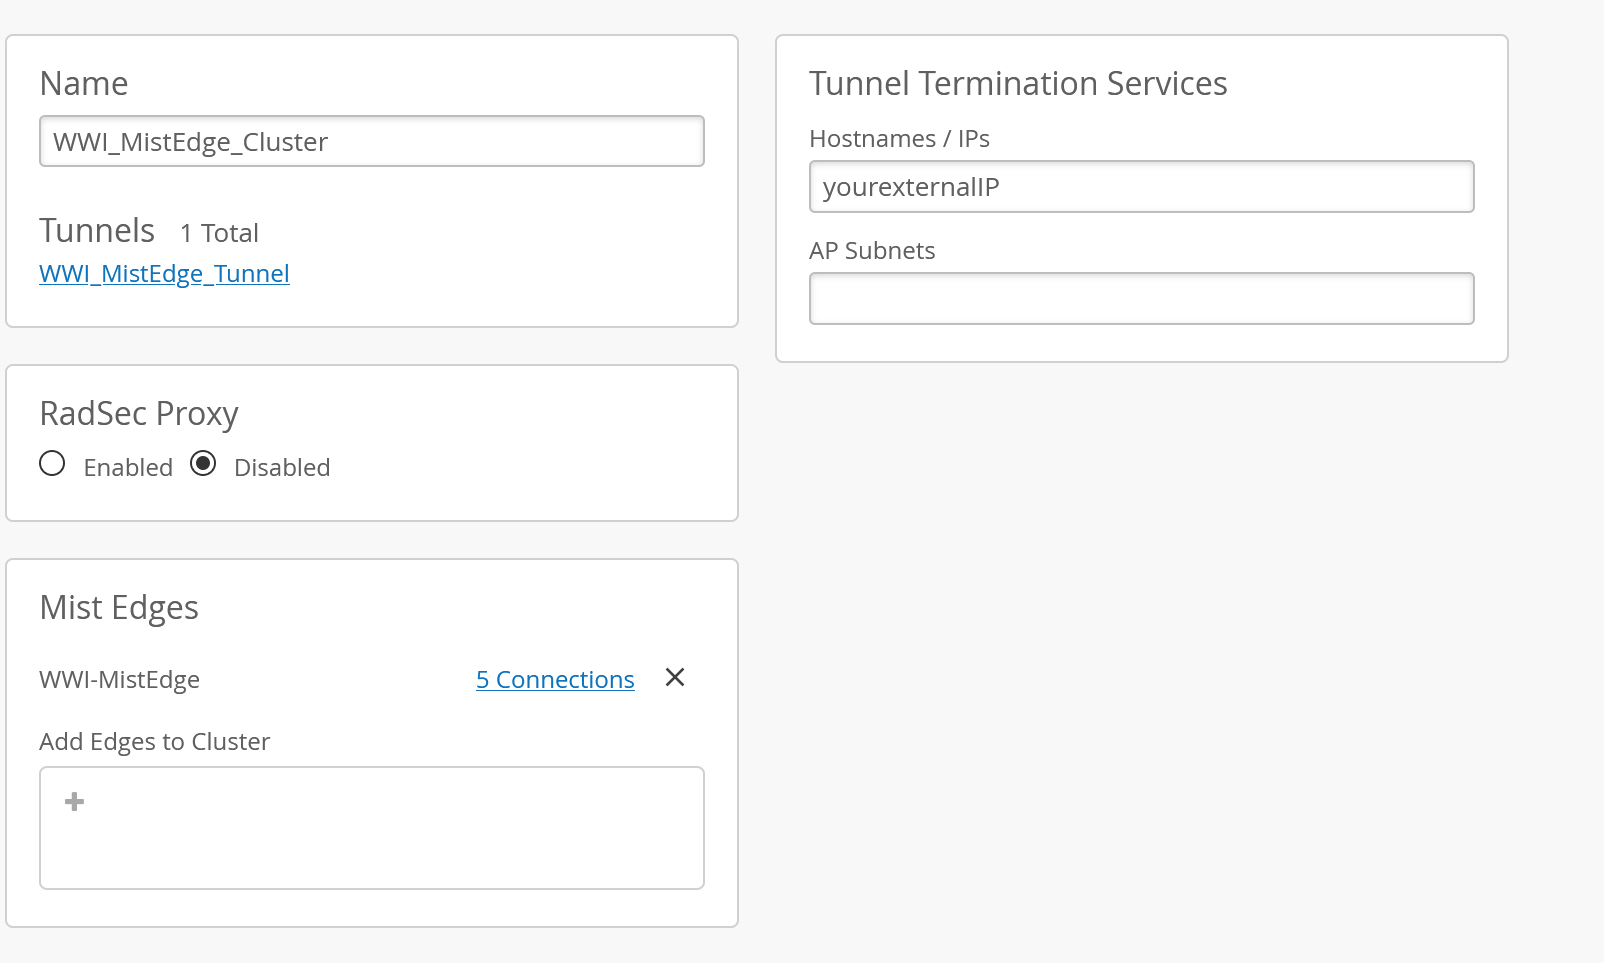
Next is time to create the cluster and assign the VM
Back to the VM!
Step3
Once it has booted for the first time the Edge will request a DHCP adress via the OOBM interface. You can use SSH to access the VM from this point or use the ESXi interface.
I wont post the default credentials here for obvious reasons!
Once logged in you need to run some elevated commands:
mist@mxedge:~$ su –
Password: *****
root@mxedge:~# apt-get update
root@mxedge:~# mxapt update mxagent 3.0.544-1
Press enter to ensure updating mxagent to 3.0.544 is complete.
root@mxedge:~# mxagent-helper configure –claim-code <pasteregistration code from previous step>
the VM will now try and get the latest software and reboot, in my case I had to manually reboot an extra time bit then it will show up in your cloud.
At first the status will be online but orange as there are no tunnels connected. Once we configure tunnels and AP’s connect the status color wil change to green.

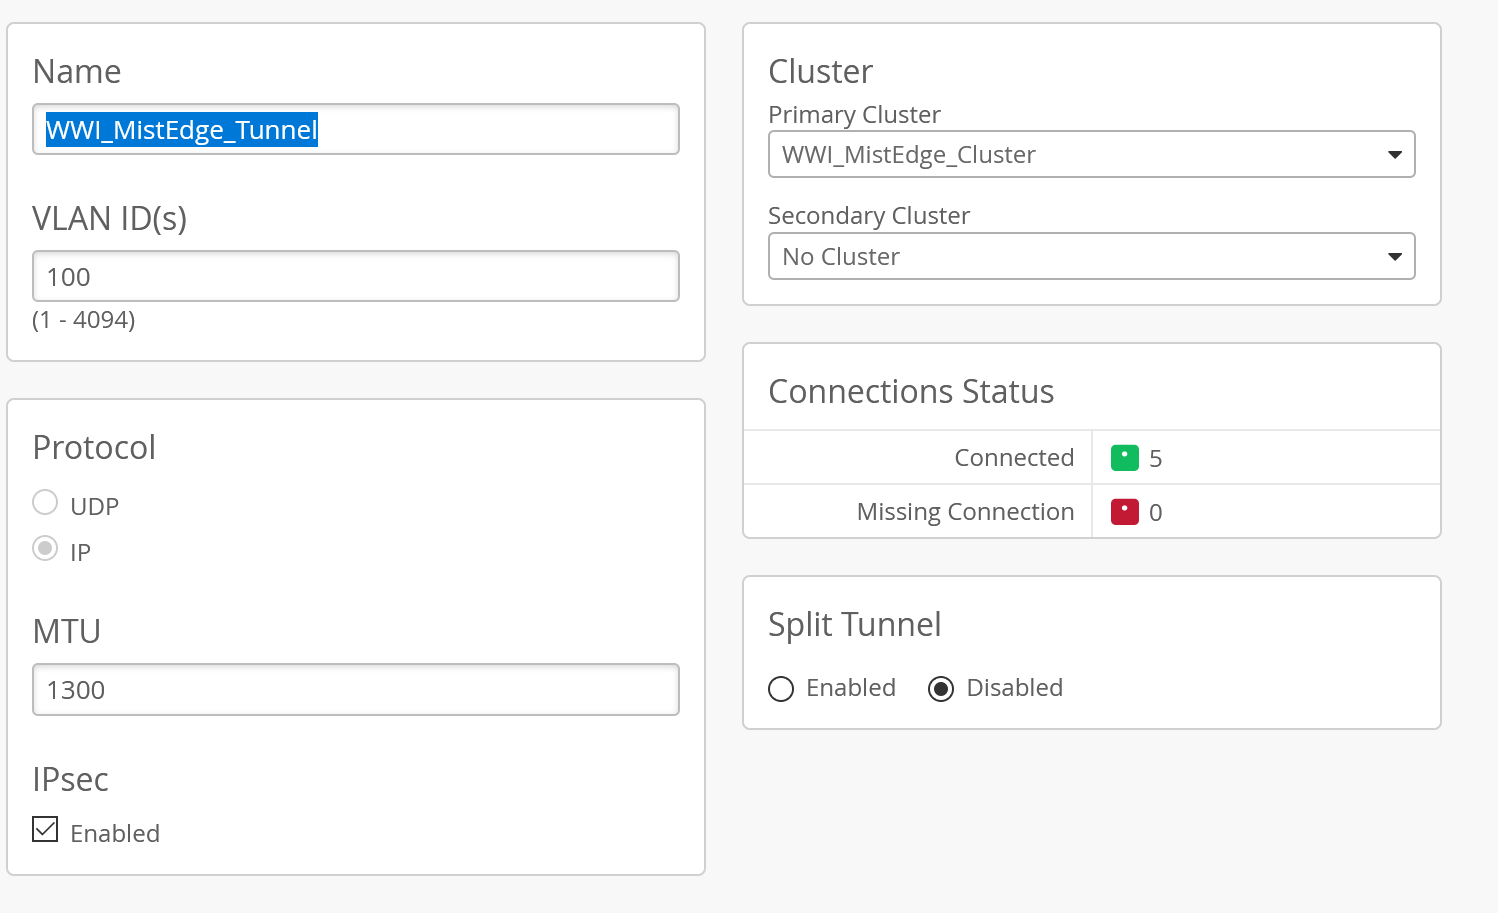
Step4
To create a ipsec or L2TPv3 tunnel from the AP to the Mist Edge we need to configure a tunnel in the UI. Here you can choose between Protocol and Tunnel, make sure you forward the correct ports on your firewall (500 / 4500) and reduce the MTU to take the ipsec overhead into account.
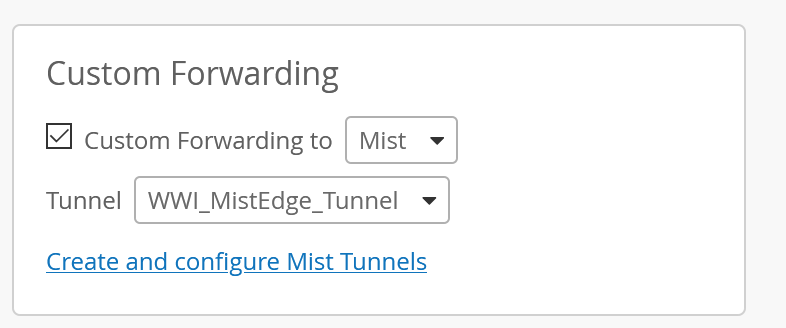
Now we’re ready for the final part, all that is left now it to create an SSID, either at the Org or Site level and assign it the VLAN you will be tunneling to the edge in the DMZ. Your data will be pushed you via the uplink (trunk)port. This VLAN should NOT be available at the AP ports or it will mess with your tunnel.
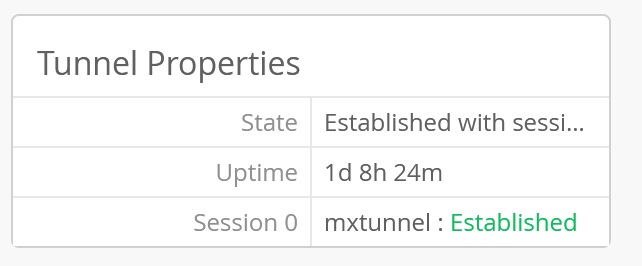
At the AP level you can see if the tunnel is successful.
Step5
Now you can ship this AP to an employee and he only has to plugin the AP (with PoE preferably) and the AP will contact the cloud, get the config, set up the tunnel and transmit the SSID with all your settings.